Month: November 2016
Transform Project
tranform-project-project-proposal
My Transform Project
Original Scene, (Mia M., 2016)
For my transform project I started of with the idea of creating tension as it was a big part of the film ’13 hours’ (2016) which I did for my case study 2. I am interested with the ideas surrounding Poker, there is a whole atmosphere tied to the game and the majority of it is tension.
Research
I looked into different poker scenes from films and came across multiple different ones, but the one that stood out the most was the scene from the film ‘Rounders’ (1998). In this scene there are two men playing a serious game of poker, betting thousands of dollars against each other.
I also looked at the poker scene from ‘Casino Royale’ (2006) where Bond is undercover during the whole thing. This gave me an idea for one of the characters being undercover, so I thought of a concept of one of the characters being a con artist and trying to cheat to gain profit.
(beaston7272, 2008)
The task for this project was to transform a scene by changing a small element of it, so I thought about what you don’t normally see during a poker game. The fantasy genre came to mind so my idea consisted of changing the two men into wizards.
I had a whole story to strengthen the idea of them being wizards by using the con artist idea and make it so he uses magic to spawn in better cards so he could cheat. However that would be a new idea all together which would fall to far from what the task actually was to begin with. So I found the scene from Rounders and decided to recreating it shot for shot but switching the characters to wizards to achieve a different outcome.
As I was transforming a scene shot by shot I just used screen grabs for the storyboards.
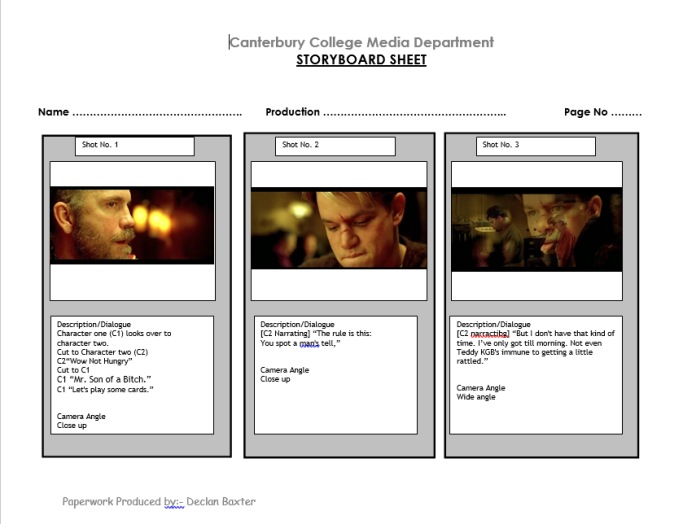
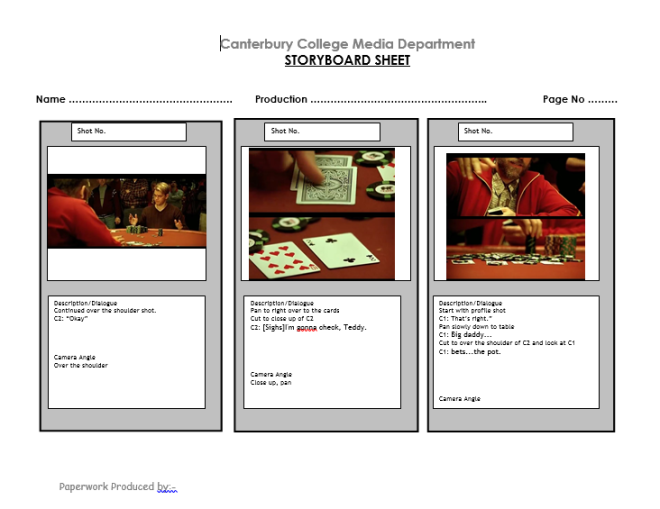

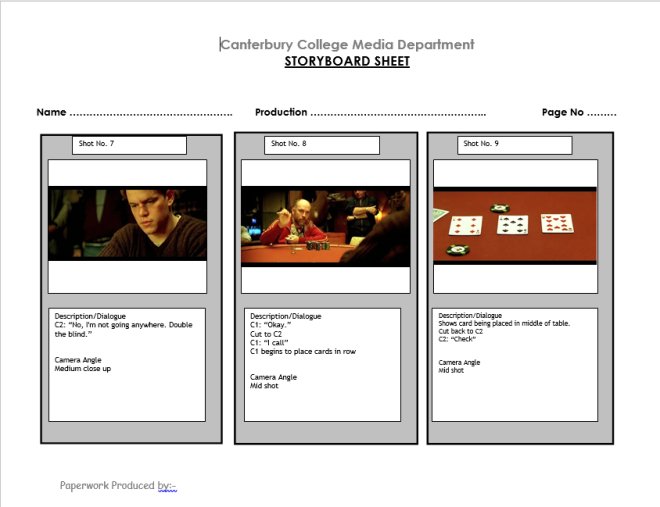

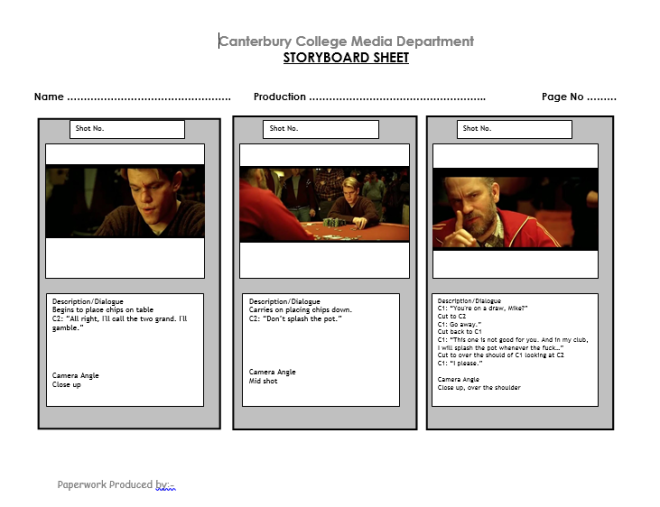


This worked well as it gave a clear indication of what the actors needed to do and what I needed to do during the editing process like transitions. I also wrote the dialogue and the screen directions on the storyboard so that the actors had this as well as the script to look at on set.
I knew where I was going to shoot as soon as I had the idea, I have a pool table at my house that looks very similar to a poker table and would look great if it was used in the scene. The scene is shot inside and under tungsten lights this location also allowed me to get the same effect by using my living room lights that are dimmable so I could control the amount of light I wanted above the actor.
In the scene there is random house hold items in the background, there is a TV, a lamp and shelves for example. So I kept some of the items I found in my house in the background to recreate that and try to add more idea to where the characters are and what type of place there in.
Props
In the scene they play the game on a proper poker table, I don’t have access to a poker table so the way I got around this was I used a pool table. The table in the scene has orange fabric but my pool table has blue fabric however this worked well and gave the same professional vibe as the poker table did in the original scene.
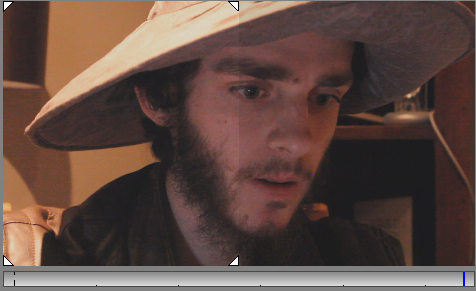
The way I created the idea of the characters being wizards was costumes. I had them both wear a wizard hat styled off the wizard from ‘The Lord of the Rings’ (2001) called Gandalf, as this was more of the wizard type I wanted to go for. However I wanted to keep some of the modern feeling so had them wear normal clothes, I feel this gave it more of a back alley feeling rather than just two wizards playing poker.

(Gandalf ‘The Lord of the Rings’ (2001))
I used a proper poker chip set that I had at my home which added the authenticity to the scene, without it the scene would have been hard to tell what game they were playing and I wouldn’t have been able to achieve the shots where the characters bet.
Lighting
The light in the film had quite an orange colour as it was set in a room using normal tungsten lights. I got this effect by using my living room lights from on set which were directly above my actors, They are dimmable as well so I could control the amount of light that I would like above my subjects. This casted a shadow from the brim of the hats onto the subjects faces. I used a small battery LED light as a fill light to get rid of most of the shadow and make the actors face visible.
This was directed from behind the camera to give the effect of it being another light source such as a lamp.
Audio
For the sound, it was all recorded on location. I used a Zoom Q2 and turned off the camera option. I set it up next to the actor but out of shot. For most of the time I left it running and moved it around depending on where it needs to, there was also one line of narration needed so I just gave the microphone to the actor and let him speak into it so I could dub it over the footage during the editing process.
At some points the scene required some poker chips to be placed onto the table, this caused the audio to spike which didn’t sound good. The way I got around this was I turned down the gain when the chips were being placed which stopped the spike and made it sound realistic.
The Q2 ran out of batteries half way through so I had to change them but when I changed them it reset so the camera was active which meant some of the audio I recorded had video along with it. This wasn’t a huge problem it just meant that the audio was slightly worse quality than the one without footage.
I took a royalty free sound effect of cards being placed on a table to create more of an effect when you see it on screen. It fit the scene well, I had to turn down the gain of the sound as it was to loud and overpowered the other audio.
Editing
When I got all my footage onto my computer none of it was labeled so I spend some time going through and naming them all depending on where they would go in the project so I didn’t have to listen and watch through them all during the editing process. I then split everything into separate folders, audio and footage.

Ones I’d done that and imported all the footage and audio into Avid, I went in chronological order adding the first clip then adding the dialogue afterwards. I didn’t know about syncing your footage in Avid until after I had finished the editing process so I just timed each individual piece of dialogue to when it was said on screen. Although the way I did it worked well and wasn’t noticeable, it would have saved a lot of time if I had synced the footage before hand.
Then after all the dialogue was added I moved onto sound effects. There was a very small amount of sound effects which were all just sounds of cards being placed as it wasn’t loud enough for the microphone to pick up as well as their voices like the sound of the poker chips.
I used the same song from the scene however the music was edited for the final product of the film so they are slightly different. It works well and fits the scene well, it also does a good job at representing what the characters are feeling.
(roundersost, 2013)
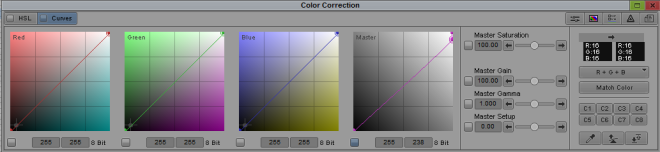
Once I was done with the audio I moved onto colour grading. I experimented with using a blue tint as that is the colour I link to wizards and mages in the fantasy world, but due to the amount of orange tungsten light coming from the lights above my actor it didn’t work well so I stayed with my original plan to keep it at a warm temperature.
I had already used the lighting to achieve the same orange tint to the scene so when I tested adding some orange using colour grade it just made it look unnatural and didn’t look right. All I did with the colour grading was darken the scene a tiny bit to make it look a little bit more professional, I didn’t want to darken it too much as the original scene was really bright as it was set to appear under tungsten light in a similar room to the one I filmed in.
After I colour graded I tried adding some black bars to make the footage have a cinematic effect, however I didn’t take this into consideration when I was filming so some of my footage was cropped out when I added them. In the end I decided not to add them due to this reason.
Target Audience
My target audience is people who are interested in poker and tension, Some people would be interested due to the original film and are interested to see what I have changed. It will not be appropriate for younger ages as there is a small amount of explicit language that parents may not approve of, this will also apply to people who don’t agree with swearing and are offended by it. So the target audience would be 15 – 80 year olds with the exception of people who might get offended.
Reflection
I was really happy with how clear the audio was this time compared to how my audio was in my FMP. I do think I should have added some aspect to the story to create the idea of them being wizards such as the characters using some sort of magic to try to win like I talked about in the research section.
I also think the lighting could have been better as a few shot you can tell that there was a light shining at the subjects so some scenes are lighter than others. This problem would be easy to fix if I was to redo this project.
I think I could have transformed it more by putting some more emphasis on the fact they are wizards. It would have made more of an impact to the scene itself almost creating an entirely new scene.
Overall I am pleased at how my project looks and sounds. Although there are a few tiny issues that could have been easily avoidable they didn’t ruin the outcome of the project.
Bibliography
(No Date) Available at: https://www.youtube.com/watch?v=8AGYQD-qGBw (Accessed: 29 November 2016).
roundersost (2013) Rounders – glowing glimmer (soundtrack OST). Available at: https://www.youtube.com/watch?v=tDJ0qIv3t1I&list=PLLzaGYdEteIEqkOOrNs7iypHbfKDkh1bE&index=12 (Accessed: 29 November 2016).
(No Date) Available at: https://www.youtube.com/?gl=GB (Accessed: 29 November 2016).
(No Date) Available at: http://www.bing.com/images/search?q=gandalf&view=detailv2&adlt=strict&id=4B25918278F06B427FAC3A9E58023E7E561443ED&selectedIndex=11&ccid=Cxtztdl0&simid=608031267159345826&thid=OIP.M0b1b73b5d974775a0409183c18f0c68bH0&ajaxhist=0 (Accessed: 5 December 2016).
beaston7272 (2008) Last poker hand in casino Royale (2006). Available at: https://www.youtube.com/watch?v=H9fyOFefirQ&t=119s (Accessed: 29 November 2016).
Tension Sound Task
For this task I had to create tension using sound. My group decided to do an exam scene which was a good way to use sound for tension as there is a lot to think about and loads of possible sounds you could find in that environment.
There was no sound recorded on location, we recorded Foley sound separately in the dead room using a Zoom H1. Most of the sounds required objects that we had access to which made getting the sounds easier, but we could have used completely different objects to create the sounds if we had decided to.
I gradually added each sound once the visual for it was seen on-screen, then towards the end it got louder and louder until the character couldn’t take it anymore and stormed out the room.
I gradually raised the gain of each of the audio so that it had the effect of getting louder in the room. I also added reverb to some of the more prominent sounds so it would sound like it’s echoing inside the characters head as if everything was getting too much to handle.
I colour graded this project to make the scene darker than it was shot, I felt by having it a little bit darker it added some tension to the scene which helped backup the sound in making the scene have tension which is the task we were trying to achieve.
We recorded audio before we recorded the footage which I felt was a mistake afterwards as some sound didn’t fit the video. If we had shot the footage first then we could have recorded sound as we were watching the video to make sure it fit perfectly. Recording sound afterwards would also allow us to make sure we got all the sounds we needed and that everything looked as it should.
I think this worked well. The ways the sounds slowly get louder creating the effect of the character hearing it in her head works great. I feel it would have made a slight improvement if we had recorded sound after the footage so we could line it all up perfectly so it would all run smoothly and be more appealing to the eye.
Lighting Task
We were set a task to recreate a certain type of scene using light. We had to create a fire scene, a person watching TV and people driving a car.
For the fire scene we used two lights. One LED light with an orange gel folded over four times to get a darker orange. At first we tried shining the second light directly at the back of the subject to create a back light but that on its own was too harsh. So we decided to shine the second one facing away from the subject being shone towards a reflector that bounced the light back to the subject to achieve a softer back light. There was also a diffuser attached to the light to also achieve a softer light. We then slowly flickered the light to add the effect of flames in front of the subject.
For the TV scene we did a similar thing. We only used the one LED light for this shot but swapped out the orange gel for a diffuser. We only used one to try to get the effect of someone sitting in a dark room watching the TV so there was no need for a back light or a fill light. We did the same flickering effect that we did for the fire but less erratic and this gave the effect that the subject was sitting in a dark room watching the television.
For the car driving scene we had to think of a way to show reflections coming from the door window. We came up with the idea of holding a small sheet of transparent plastic in front off the lens and move it around which would reflect the light and hopefully recreate reflections of passing street lamps and buildings on a car door window. This effect turned out to work quite well and we was all impressed at how similar it was to the effect we was trying to achieve. If we had more time we could have tested out and adapted our techniques to hopefully achieve a more realistic look.
I think the TV effect worked the best and would have worked great if there was sound to go with it, it looked the most realistic out of the three and would be a good technique to use in a project in the future.
